Brisco County Jr. Orb Rod

In 1993, The Adventures of Brisco County Jr. premiered on Fox. It was about a Bounty Hunter in the old west, and his mission to round up the gang of outlaws who killed his father, a famous Marshal. Brisco County is a Harvard educated lawyer who is eagerly looking to the future for the “coming thing”.

As he works to capture all the outlaws responsible for his father’s death, he has multiple encounters with a mysterious object only known as ‘the orb’. In the first episode we learn that the orb can grant power to people who possess it. As we continue through the season, we learn more about the orb’s power and origins, but its mystery isn’t completely unraveled until nearly the end of the season.

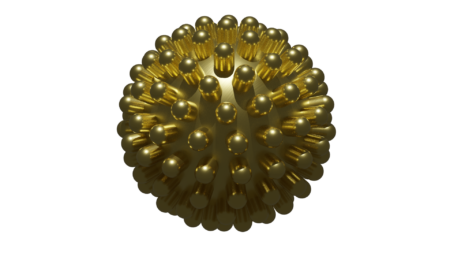
The orb is hard to describe. It’s a golden, spherical object with protrusions regularly distributed across it’s surface. These protrusions are the end-caps or glowing rods that can be removed from the orb. As a kid, I always thought that the orb’s mystery and power was very fantastic, and I always wanted to see it in person, or to own it.

Reference photo found on a prop auction site

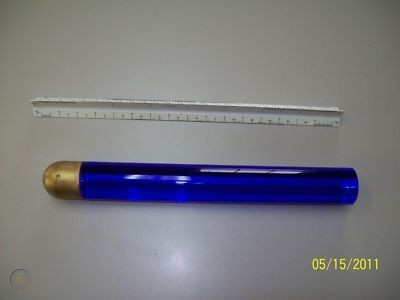
I finally decided that it was time to replicate it. Not the whole thing, just one of the orb rods. I’ve done a bit of research here and there over the years and have never gotten a straight answer on the exact size of the prop. I managed to find a small image of a prop replica that was built from the same mold as the original prop. Luckily, this prop happened to be photographed next to a ruler. I inferred the measurements to the best of my ability and concluded that the prop orb rod is about 1.5 inches in diameter, and about 13.25 inches long.

Brisco County Orb Rod Plans

I was able to find blue acrylic rod in 1.5 inch diameter from a supplier on eBay for a good price. I then bought some Brass stock on Amazon, also 1.5 inches in diameter.

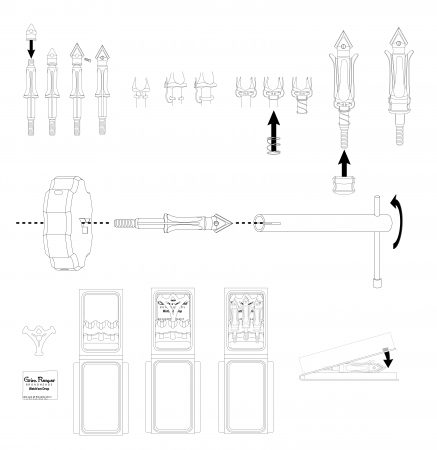
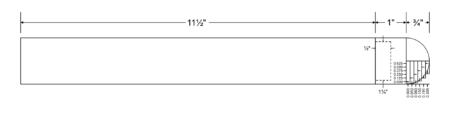
I don’t have any tooling for doing a rounded end of this diameter, so I used the lathe to create steps at 1/8 inch intervals in the brass that match the contour of a .75 inch radius sphere. I then used a file to smooth it down to a nice rounded end. A little bit of sanding, and then a clear coat of lacquer to prevent tarnishing, and the cap is finished. The reverse side was drilled out to 1 inch to accommodate the acrylic rod.

There wasn’t much to do on the acrylic rod, except to machine down one end in order to insert it into the cap. Additionally, the other end was fairly rough from being cut off with a band-saw by the seller. I used progressively finer sand paper on the end, finishing with a 2000 grit wet sanding to get it to be a clear and smooth as possible.

The last step was to epoxy the cap onto the acrylic rod.

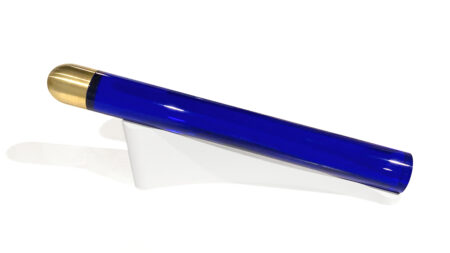
Finally, after many decades, I have the prop replica I’ve always dreamed about.

Sadly, Brisco County Jr. was cancelled in its first season. Despite being cancelled, I find it to be an enduring show full of the witty one-liners you’d expect from Bruce Campbell, the charm of old spaghetti westerns, and a touch of sci-fi. Luckily, the show was able to satisfyingly conclude it’s storyline, so even while it was cancelled, it feels complete, and is one show that I frequently rewatch.

Wile E. Coyote

Wile E. Coyote was a large part of my childhood. His cartoons were my favorite of all the Looney Tunes. I love his determination at catching the Road-Runner. I love his inexhaustible budget for all things ACME. I love the complexity of his Rube Goldberg-like plans. I love the absurdity of his failures.

One of my favorite episodes is “Beep, Beep” from 1958. In this one, Coyote employs blueprints to aid in his preparations against Road-Runner. I think of the blueprints as quintessential coyote-ness, however after a careful rewatch of all the shorts I have access to, he only uses blueprints in this episode and “Operation Rabbit.”

At any rate, the blueprints from this episode make me smile, and I thought printing the blueprints out would be a nice thing for a shop wall or for other family member who also have a fondness for the determined coyote.

I screen-grabbed some shots off of a Laser Disc compilation of Road Runner shorts and redrew them using Affinity Designer. I tried to be true to the source material so that the images would be clearly recognizable. I took some liberties by straightening some lines, using a font instead of hand written letters, etc., and I am pleased with the results.

Screen capture from Laser Disc

In this first scene, Wile E. Coyote plans to drop an anvil onto an unsuspecting Road-Runner from a tight-wire strung across a gorge.

Screen capture from Laser Disc

In this second scene, a box is rigged to explode when the water glass is lifted. One of the things I love about the box is that even though it is introduced near the beginning of the episode, the payoff comes at the end after the viewer has probably assumed the gag was over and not going to be revisited.

While, I don’t want him to hurt the Road-Runner, I do feel a sense of pity for him and all the pain he has to endure for the audience’s enjoyment.


Technical Drawings

When I was pretty young, my dad was working at a start-up with relatively few employees; maybe twenty or so. I used to go in and help with odd jobs. It started with assembling workbenches, pulling CAT5 cable and graduated on to mechanical assembly and packaging of products. Along the way I learned other skills too, like soldering, debugging, and illustration.

I grew up with exposure to Adobe Photoshop and Illustrator. Because of this exposure, I was asked to create an assembly drawing of our product. I had never done anything that complex before. I was sat down in an office with a computer running Adobe Illustrator, along with the assembly that needed to be drawn. I was pretty familiar with the part since I had assembled hundreds of them before. I worked for a full day (maybe more, I don’t remember since it was so long ago) and I created my first technical drawing.

Assembly Diagram for Indigita AVHD

I found that I enjoyed working in this style. Even today, I’m pretty pleased with how my first foray turned out.

Over the years I’ve had a few occasions to do this type of work, but not as often as I might prefer. When my family was involved with the Darpa Grand Challenge, I made some illustrations of the car, Golem 3.

Side view of a Prius

During my education I had numerous times when I was able to make use of this type of drawing for research papers and reports. In my internship, I created assembly instructions for mechanical arrowheads which relied heavily on technical drawings.

Assortment of product diagrams used in assembly instructions

Presently my full-time job description does not include this type of work, but I have found occasions when it became necessary to create drawings. For example, the user manual for the software I am working on needed diagrams to illustrate connection of the hardware with which our software operates. I took it upon myself to provide the artwork. It was a nice break from the routine.

User’s Manual Connection Diagram

In diagrams, it’s important to use visual cues to convey orientation and differentiate parts. It’s equally as important to reduce extraneous features in order remove visual noise and not distract the viewer. Finding that balance of conveying enough, but not too much, visual information is very rewarding.

I also like the freedom of working with fewer colors. In many instances, these types of drawing will be printed in black and white, and even when drawings can be viewed in color, it’s best to leave them less saturated as to not distract and draw the eye of the viewer to unimportant details.

Doing this type of work is very relaxing for me.

© 2007-2015 Michael Caldwell