Mac Pro 3,1 (Early 2008)

Mac Pro

I would generally say there are three types of computer user:

  • Consumer: People who wants something that will get them online, print documents, and just work without any hassle.
  • Enthusiast: (AKA Prosumer) People who like to buy professional products, enjoy tinkering, and dabble in the occasional professional-level project.
  • Professional: People who legitimately needs power for rendering, computing, and getting things done on a daily basis.

I’d put myself in the enthusiast column. I don’t do tons of 3D renderings, or giant Final Cut projects, and I don’t game. I do occasionally encode videos, CAD, and do lots of work with Adobe products. I certainly don’t need a top of the line machine, but I certainly enjoy having the best!

Computers are expensive. At least, they have been historically. For those of us who like Macs, they still are! Sure, the MacMini will only set you back $600, but that’s not the category of computer I am interested in.

Mac Pro 2013

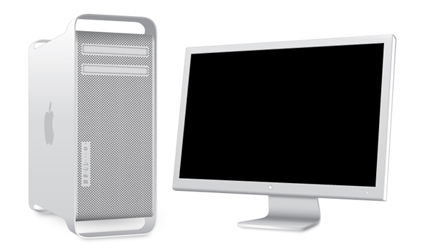
The Mac Pro (and the Power Mac before it) is the line of computer that enthusiasts and professionals have loved owning. To do so, you have to be ready to be ready to part with beaucoup bucks! These machines costs thousands of dollars. For a point of reference, The current iteration of the MacPro is selling today at bargain basement entry price of $2999.00!

Professionals can usually justify the costs of such a workhorse (since it’s a business expense and ideally increases productivity, affecting the bottom line in a positive way). The rest of us have to find some other way to justify the cost…

From my anecdotal evidence (a sample size of 1…), I have found that buying the lowest end configuration of the high-end tier to be the least financially devastating for two reasons:

  1. More durable – They can withstand being used day in and day out for years
  2. More upgradable – Usefulness can be augmented through gradual upgrades over time

In October of 2008, I convinced my wife to let me buy a Mac Pro. Not just any Mac Pro, the lowest-end Mac Pro they made. A quad core 2.8 GHz with 2 Gigs of RAM. All for the paltry sum of $2,200 (Which was actually a lot at the time since we were poor college kids). In order to spend the money, I had to promise that this would be the only computer I purchase for the next 5 years.

I have been a huge proponent of the tower form factor due to the power, longevity, and upgradability. It’s now been over 7 years since that initial purchase, and I still use this computer every day. It’s still wonderfully capable. Over the years, I’ve been able to exploit it’s upgradability, and I believe I have saved a lot of money by doing so.

Since the initial purchase, I’ve upgraded the RAM, the processors, the graphics card, the optical drives, the hard drives, the wireless card, and installed an SSD. I’ve tabulated the cost over the years to maintain and upgrade:

Year Upgrade Cost
2008 Base Purchase $2,200.00
2009 Second 2.8 GHz CPU $350.00
2009 12GB RAM $250.00
2013 SSD Drive $120.00
2013 BluRay Drive $80.00
2015 PCIe SATA3 controller for SSD $45.00
2015 New AMD GPU $120.00
2016 2x 3.2 GHz CPUs $90.00

Total Cost: $3255.00
Cost per Year: $406.86

You can see how steeply component costs go down over time. The additional CPU was quite costly just a year or so after the initial purchase. The price has since plummeted to the point that I replaced both CPUs for under $100.

Slightly relevant XKCD.

To test my thesis that the route of gradually upgrading a low-end high-end Mac is cost effective, I am going to compare against two alternative philosophies I’ve entertained and do a really quick and dirty, back-of-the-envelope comparison of hypothetical cost.

Single High End Purchase

The first alternative is to buy the biggest, best computer upfront with the intent of using it for years on end, and never upgrade it.

Using the WayBack machine, I am able to look at Apple’s store site from the month when I originally purchased my Mac Pro. Matching the specs as closely as possible to my current specs, we have the following (ignoring sales tax):

Item Cost
Base System $2,799.00
3.2 GHz Upgrade $1,600.00
16 GB RAM $3,500.00
Upgraded Video Card $2,850.00

Total Cost: $10,749.00
Cost per Year: $1,535.57

The instant gratification of having the most up-to-date and fastest machine that Apple makes comes at a cost! Clearly this is not the most economical way to roll. And of course always remember to never buy RAM from Apple.

The reason this is so much more expensive is because, as computers depreciate over time, so do the cost for components. So in order to have the goods up front, you have to be ready to pay a premium for cutting-edge hardware.

Frequent Replacement

Another philosophy I’ve considered is to purchase a more modest machine, but instead of upgrading components, upgrade the entire system every few years. The thought process is that you can sell the old machine while it still has value to offset the cost of the newer machine.

Lets say that we replace the machine every three years. This gives the advantage of always being in warranty (assuming you purchase AppleCare). Based on evidence from a quick browsing of eBay, I will assume that a machine 3 years old will sell for about 1/3 of it’s original value (super rough estimation!).

Year Computer Buy Price Sell Price Net Cost
2008 Mac Pro 4 x 2.8 GHz $2,299.00 $765.00 $1,534.00
2011 Mac Pro 4 x 3.2 GHz Nahalem $2,499.00 $833.00 $1,666.00
2014 Mac Pro 4 x 3.7 GHz $2,999.00

Total Cost: $6,199.00
Cost per Year: $885.57

As you can see from this hypothetical, and very rough example, the difference in yearly cost to own an updated computer is about double of the approach of upgrading components.

Perhaps though we should consider the performance difference between the current low-end high-end computer versus the performance of the upgraded 7 year old computer?

Thanks to GeekBench, we have a huge pool of data to look at. Just doing a cursory search, I found these results:

Model Speed Single Core Score Multi Core Score
Mac Pro 2008 8x 3.2 GHz 1743 12149
Mac Pro 2013 4x 3.7 GHz 3235 12780

The single core performance of the new machine is tremendously better than the 7 year old Mac. The multi-core performance isn’t significantly better though. There are obviously many other improvements, including GPUs, bus speeds, and SSD performance to consider as well.

Conclusion

The question is, how much are you willing to spend? This is different for everyone. For me, I believe that there is value in upgrading and keeping products as long as possible. I am very happy with the gains I’ve been able to make over the years by performing gradual updates in order to keep the machine somewhat modern. There is no single right answer for everyone, but for me, this suits me just fine.

Microbolometer

My uncle is a physicist, and did some pioneering work in the field of thermal camera photo-receptors. He even wrote a book about the field in the 90’s, Fundamentals of Infrared and Visible Detector Operation and Testing (1990, James David Vincent).

512JMVWtmkL._SX331_BO1,204,203,200_

The publisher wanted an updated manuscript for a second edition of the book. He’s been working on that for the past couple of years, but ran into a problem. He needed a diagram of a microbolometer.

A microbolometer is a small sensor that is sensitive to infrared radiation. The radiation hits a sensitive material that then heats up, and its resistive value changes. By measuring the resistive change, a temperature can be determined. Thermal cameras, such as FLIR cameras, use an array of microbolometers to generate a thermal image.

Although diagrams exist, the most well known (and oft plagiarized) is in fact under copyright, and not available to be republished without authorization.

He asked me to create a new diagram that would convey the same information but be visually distinguishable from the other well-known image.

After some back and forth, this is the image we came up with. It had to be black and white for printing, and easily readable. He also wanted extraneous information removed, so that there were fewer parts of the image to focus on.

Microbolometer_3

For example, the thicknesses and dimensions, though accurate, are not labeled. To facilitate not having a labeled dimension between the ROIC and the temperature sensitive resistive element, there is a visible shadow. The image was created in Illustrator, and sent to the publisher as an EPS file.

The book, Fundamentals of Infrared and Visible Detector Operation and Testing second Edition (2015, John David Vincent, Steve Hodges, John Vampola, Mark Stegall, Greg Pierce), has been published, and you can see my diagram on page 94, Figure 3.3.


This Old House

I was recently compelled to move from the town-house that I had been renting. I then had to find a new place to live post-haste. This frenzied search for real estate is the reason for my lapse in posts, as well as any measurable progress on my numerous projects.

Luckily, I was able to find a place to live in the right price range, and in the very community in which we wanted to live! The previous owner had moved out over a decade prior to it being put on the market, and it had been sitting vacant all these years. Naturally, the property needed quite a bit of TLC. The town-home is a 50 year old property, and nearly completely original. There were things needed to be fixed and many opportunities for upgrades. And if one is going to go through the trouble to fix something up, one may as well go whole-hog!

Things that need to go

IMG_3909

The kitchen needs to be re-done. It had the original cabinets. The configuration was a small u shaped kitchen. It clearly segregated the dining area from the cooking area. Due to the size constraints, the oven and range were in the peninsula. There was an opportunity to improve the space to make it feel more open and modern.

IMG_4756

IMG_4755

The stairs opened into both the dining room and the living room on the bottom floor. The opening was neat, but we would have a lot more wall space if it only opened into one room.

The stairs has a large dead space above it that isn’t being utilized. We will either utilize it or get rid of it so it feels more open.

IMG_3921

IMG_3911

The bathrooms appeared to be left in a mid-remodel state. No flooring, no toilets, yellowed counter-tops. Another opportunity for improvement!

Things that need to change

Aluminum wiring. The property was built during the 60’s when aluminum wiring was briefly the norm. We will replace it with copper, and save ourselves the fire-risk! This also gives us the benefit of being able to wire our light switches so that they behave the way we would expect them to.

ABS plumbing will replace the outdated cast iron plumbing. No old sewage for us to contend with!

Things that need to be added

The original plans for our unit that we found at City Hall showed that there was a half bath downstairs. Now there is not! But there soon will be…

It gets hot here. Really hot. We had a tough time during some of the summer months at our old town-home. We don’t want to repeat that, so we will put in air-conditioning!

Flooring. All the flooring is completely absent. We will be going with something that looks like wood, as well as carpet.

Lights. Older houses usually have no built in lights; just sockets that are connected to the switches. But no more! Recessed lighting, and ceiling fans will adorn this old house!

Time frame

Well, there isn’t much time to get this all done. The goal will be three weeks. This is hopelessly optimistic, but still worth shooting for. All of the work will be done by… Well… My dad, and me, and anyone who is willing to help. The following posts will follow our progress with this seeming impossible task. I’m sure we will learn lots along the way.

Week 1

IMG_4034

I took this entire week off from work to… work on this project. The main focus this week was tearing into the walls, and getting it ready to put back together.

IMG_4008

IMG_4018

IMG_4029

We got rid of the old kitchen and bathrooms pretty quickly and easily. No surprises there. We proceeded to remove all the drywall on exterior walls, because there is no insulation. No wonder it gets so hot! This also gave us easy access to wires and pipes. We removed the ceiling too, as it was necessary for all the wiring as well.

IMG_4036

IMG_4037

I figured out where all the lighting would go, and put in the fixtures accordingly. I was able to run wire with the help of my friends while my dad masterminded the whole electrical operation and wired up the main fuse box.

IMG_4063

We got the air conditioning unit in place and (temporarily) installed. This was a bit difficult because it didn’t entirely fit in the attic as we had planned. We had to remove the attic stairs, and notch out one of the rafters with a sawzall in order to shimmy it into place. Once in place, we all helped run the copper lines to the unit outside and then dad charged it up. Now we can work in the cool! The plumbing for the condensate line won’t be installed until later, nor will the return be put in properly until we have time down the road.

IMG_4103

IMG_4111

The area under the stairs appears to have been underutilized space for most of it’s life. I am told that it was the habitation of the former owner’s duck. We reworked it from being one closet to being a pantry, refrigeration alcove, and a storage space. We had to add in some walls, and remove some 2x4s. A large 6×4 header was inserted with the appropriate amount of jack studs in order to preserve the structural integrity of the walls.

IMG_4046

IMG_4075

IMG_4165

The last thing that we finished this week was getting the plumbing installed for the half bath. This involved cutting away the concrete, digging 3 feet down to the sewer pipe, and adding a y junction that comes up to the toilet. This had to be filled back in with dirt, then a layer of plastic, and finally a layer of concrete with re-bar and chicken wire embedded there-in.

IMG_4130

IMG_4140

IMG_4147

IMG_4166

We got quite a lot done in just 6 days!

Week 2

This week, we focused a lot on plumbing. We began to remove the exposed iron sewage pipes in order to replace it with the newer ABS pipes. Most of the pipes above the ground all the way to the fixtures were replaced.

IMG_4192

More wiring was run from the breaker to the outlets throughout the hose. In the bedrooms, we had to put in mounts for ceiling fans. This was an easy task because the attic gives us direct access to the ceiling sheet rock.

IMG_4171

The half bathroom downstairs got fitted with walls. Nothing tricky there. We used pressure treated lumber on the base, which gets nailed into the concrete using a RamSet (powdered nail gun). The door for the bathroom got some of the beefy 4×6 header left over from the stairs modification last week. Nothing wrong with over-engineering…

IMG_4189

A new copper line had to be run from the bathroom over to the refrigeration alcove for a water supply line for a future refrigerator. We also wired it up for power. A second supply line was run from the sink to the other end of the 1/2 bath for the toilet supply line.

IMG_4228

In the upstairs bathroom, we laid some concrete board (1/4 inch) for the tile to be set on. The only other modification in the upstairs bathroom was in the master bath. The original bathroom had a corner type shower stall with 2 walls. We changed this to be a booth type shower with 3 walls. This required adding a wall to the bathroom to separate the toilet from the shower.

IMG_4221

The stair well was a mystery. For some reason, the stairs had a sloping ceiling that (kind of) followed the slope of the stairs. It made it feel confining, and even more baffling, was that the space was completely unutilized behind. We had to knock it out last week in order to get the new bathtub up the stairs. This week, I made a wall/platform to enclose a storage space that will be accessible from the master bedroom closet. The remainder of the stairwell will be open so it doesn’t feel so claustrophobic.

Lastly, I ran some CAT6A to make sure we are set for the future of 10 gigabit ethernet!

IMG_5047

Week 3

This week, I returned to work. We are now just working in evenings and on Saturdays. We got the copper pipe for the new shower fixtures brazed and ready to go. Now that all the copper is done, we were able to pressurize it and check for leaks. We only had a couple places that needed to be re-brazed.

IMG_4234

We also connected the sewage lines to the fittings for the toilet and shower. We leak tested it and it all looks good to go.

IMG_4277

The master bedroom had the oddest (not-to-code) window you’ve ever seen. It is a 2 foot by 8 foot window that is 54 inches off the ground. Code requires that bedroom windows are no more than 42 inches off the ground so that in the case of an emergency, occupants can climb out. We aren’t ready to insert a new window just yet, but we want to be ready, so we cut the 2x4s and inserted a new sill at the correct height so we can easily replace the window with a 3×8 foot window at a later date.

IMG_4261

The kitchen plumbing was finished, as well as some other odds and ends, like the exhaust for the future microwave.

IMG_4259

The last thing to do was to insert the insulation. We insulated all of the outside walls in an attempt to make the house’s temperature easier to manage. It looks so nice all pink and green! The green was the existing insulation that they put in to act as a sound buffer for the neighbors.

IMG_4266

The very last thing before letting the drywallers button it up was to staple all the electrical cables. Electrical wires (romex) needs to be stapled to the studs within a foot of the electrical boxes (outlets). There should also be staples to keep the wires from sagging in the overhead stretches.

Now, dry-walling will begin.

Week 4

We hired a guy and his brother to drywall the entire place. All of the downstairs needed to be dry walled, as well as exterior walls upstairs and patching throughout.

IMG_4289

IMG_4295

IMG_4299

In the mean time, we kept ourselves busy by assembling kitchen cabinets, and pre-painting the new doors we purchased. The doors came pre-hung, and we got the solid core doors. We used an airless spray gun, which made it only take a few seconds to paint an entire door. We also got the trim and baseboard painted as well.

By the end of the week, the downstairs was textured. The upstairs is still a work in progress.

Week 5-6

With the downstairs ready to go, I primed the entire thing using the airless sprayer. That made it take a little more than one hour.

IMG_4347

Once the primer dried, I was able to paint the ceiling. (again with the sprayer).

The remainder will have to be rolled. The first room to be rolled was the half-bath. Once it was painted, dad was anxious to hook up the pedestal sink and toilet. (Now we can stop bugging the neighbors…)

IMG_4348

The rest of the downstairs was gradually painted over the week. As walls got painted, switches, and outlets got connected.

The cabinets we put together got roughly placed in the kitchen. A temporary counter top made of plywood was also installed. This will actually stay as the structural layer underneath the eventual corian counter top that will be installed later on.

IMG_4373

We hung the first door, which was the bathroom door. This was the first time i had ever hung a door. Not too shabby!

IMG_4378

The next day, with the help of a friend from church, we were able to hang the remainder of the doors in just a couple of hours. It’s beginning to feel like an actual house!

IMG_4413

With all the walls being finished and textured, we were able to paint throughout the house.

Week 7-8

The progress on the house slowed a little bit during these two weeks. This is partially due to burn-out, and partially due to the fact that the smaller pieces of the project seem less grandiose when finished.

One of the first things I worked on in my spare time was grouting the tile. That made a huge difference in the presentation of the tile. It looks so new and clean!

Another thing my dad and I were able to finish up during our off hours was the air conditioning. It’s been hooked up, but needed some additional things to be 100% complete. One of those was the installation of the air return. For practicality reasons, it was installed at the top of the stairs. This allows for easy changing of filters which is supposed to happen quarterly. We also hooked up the last room.

IMG_4417

New regulation in our city require that the garbage disposal and dishwasher have independent circuits. This seems ludicrous for appliances that are used only for a small amount of the time each day… But none-the-less, it required some clever wiring to bring it up to code. A small patch of the wall, and some splicing into existing wires that were going to the garage, we were able to accomplish this fairly quickly.

IMG_0571

Door trim throughout the house is now on. It’s not a difficult thing to do, but took some time. It makes quite a big difference in the appearance of the house.

IMG_4418

Baseboards got installed upstairs. Those pieces were very large, and kind of hard to maneuver. We made the cuts on the back patio, then brought the large pieces up through the bedroom window.

IMG_0582

IMG_0579

Once installed, we had to painstakingly go through and caulk the edges and joints. It’s still not all done. I debate the worth of such laborious endeavors; alas, it does look better in the end.

Week 9

Week nine began with some important business, like the addition of a kitchen sink (albeit with plywood counter top for now), the addition of fixtures and proper sealing of the bathtub and shower, and fully functional bathroom vanities and toilets.

IMG_0615

IMG_0622

Ceiling fans and lighting fixtures were installed.

IMG_0590

IMG_0594

We also completed the flooring downstairs! With this, we also installed all the remaining baseboards.

IMG_0591

IMG_0601

The carpet installers came, and got the upstairs and stairway carpeted. It looks amazing!

IMG_0614

IMG_0612

IMG_0610

IMG_0606

Another big item that got finished was the replacement of 4 windows (out of 6). The remaining windows are less important right now because they will require more work. The four windows we replaced are window inserts, meaning that nothing needed to be modified (drywall, stucco, framing, etc).

IMG_0639

IMG_0640

IMG_0641

Some other minor things got finished, like the medicine cabinets, pantry shelving, and closets.

IMG_0629

IMG_0625

With so much complete, it is finally time to move in. We moved in this week, and will have to finish the rest as we go. The kids love it, and we love it too. It’s changed so radically from its previous incarnation.

Onward

As time has gone on, we’ve been able to complete more things at our own pace. One of the first things was a corian counter top. To save on money, we bought the material directly and my dad fabricated it in his workshop. We then transported it, and installed it on top of the plywood counter top we had been using. (I didn’t manage to take any photos during installation…)

We got the big master bedroom window installed. It required cutting away the stucco, expanding the hole to the pre-prepared new size, installing the window itself, and then waterproofing with flashing material, after which the whole this is restuccoed and painted. My contractor friend was kind enough to come help and make sure we did it correctly.

We’ve installed blinds and interior sills and trim on the windows.

And we took the original stair railing, had it sandblasted and powder coated, then reinstalled it.

IMG_0237

There are still quite a few things that will need to be tackled. Some of these include:

  • Doors for linen closets, and pantry
  • Closet doors
  • Other cosmetic things

Certainly, there is plenty to do, and it will keep us busy, I’m sure, for the foreseeable future. The good news is that the bulk is finished, and we are finally getting settled into this new home.

Thank you

A big thank you to everyone who helped. This includes friends, relative, neighbors, all who selflessly helped on this huge project. And a special thanks to my dad, without whom, this project could not have happened. He provided the knowledge, experience, and work ethic needed to accomplish such a task!

© 2007-2015 Michael Caldwell