As a young person, I was quite enamored with Reese’s peanut butter cups. Those were one of my favorite candies to eat during the holidays. It’s now been over 5 years since I have tasted them. This isn’t due to amazing will power and good dieting, it’s due to the fact that those candies are lethal to my son. Yet, I still long for those treats.
I decided to make my own that would be safe for my family. I figured I’d be able to find a candy mold for just such a project, but was unable to find any. I was able to make an approximation of a Reese’s peanut butter cup by using cup cake holders, but I still felt that having the correct type of mold would yield better results.
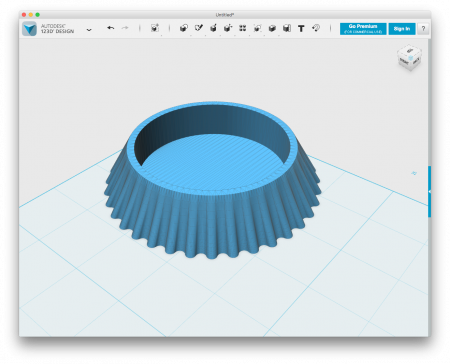
I devised a plan for how I would do it, and then modeled the geometry in Autocad Inventor. The idea is to model the geometry I want (a positive) and use a CNC machine to carve this geometry. From the positive CNC generated shape, I will create a negative mold using a food-grade silicone rubber. Then, finally, I can make the chocolate treats using the silicone mold.
Modeling
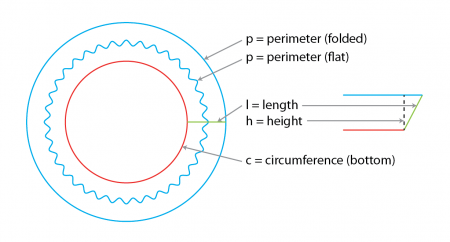
Modeling the shape was pretty easy. I figured out the basic dimensions I wanted and modeled accordingly. The final shape should be about 2 inches in diameter and .5 inches tall. Even though I have no intention of wrapping these in paper, I did some careful math to make sure the ridges were appropriately shaped to allow a circular piece of wrapping to be applied. This was done by making sure the perimeter of the ridged top was equal to the circumference of a circle whose radius is equal to the bottom’s radius plus the length of the side.
The goal is to have a void in the chocolate where anything can be put inside.
CNCing
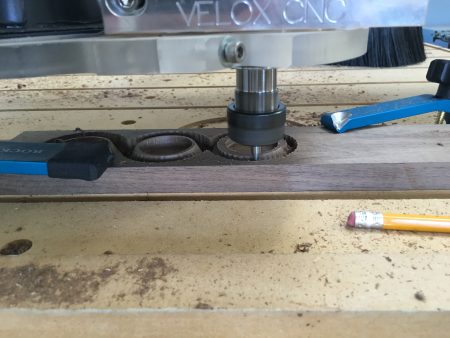
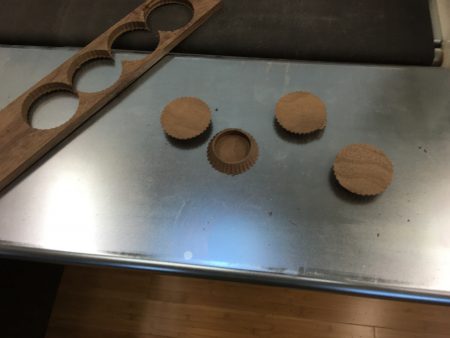
With the model looking okay, I CNCed the geometry out of some scrap hardwood left over from another project.
After CNCing, I removed the positive geometry, and sanded and filled the wood as best I could.
I then put 4 of the positive carvings in a void made out of particle board. Once glued, the whole thing was coated with black enamel to fill the gaps and hopefully make the silicone not stick.
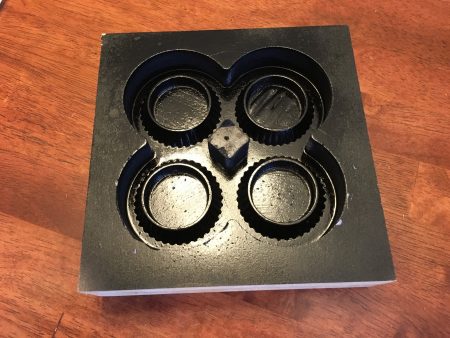
Casting
I ordered a small supply of silicone casting (Smooth-Sil 945) from Smooth-On. This particular product is food-safe, and is activated using a 50:50 mixture of A and B parts, so it’s really easy to use.
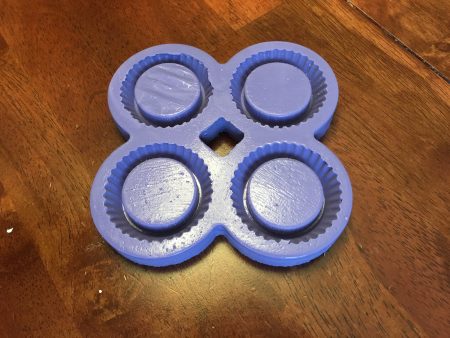
Using some simple geometry, I figured out exactly how much material I would need. I poured the correct amounts into disposable bowls and mixed thoroughly, then poured the material into my mold. 6 hours later, I was able to pull the mold out. It turned out very well!
Chocolate
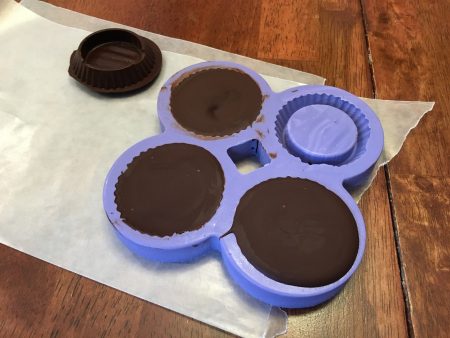
The next step was to take chocolate, and lightly melt it. I used Guittard chocolate, which is nut-safe. I tried different types, but liked the more milky flavors the best (Milk Chocolate 30% Cacoa). Not being a chocolateer, I have a bit to learn. From what I understand, the key to successfully making chocolate treats is to temper the chocolate by melting it at about 115 degrees, then letting it cool slowly at a temperature of 75 degrees. I could be wrong, but it did seem to work.
I was left with things that look like Reese’s, but have an opening and a void on the bottom!
Soy Butter
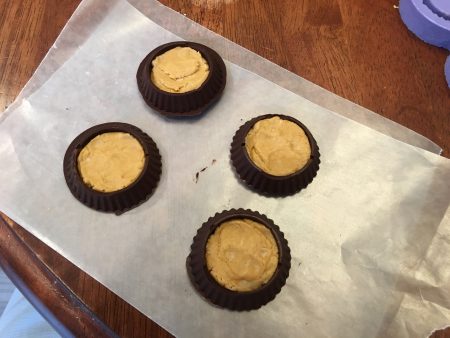
The delicious insides is a combination of Wowbutter brand soy butter, butter, brown sugar, and powdered sugar. The butter and soy butter are heated, then sugars are added, and then cooled.
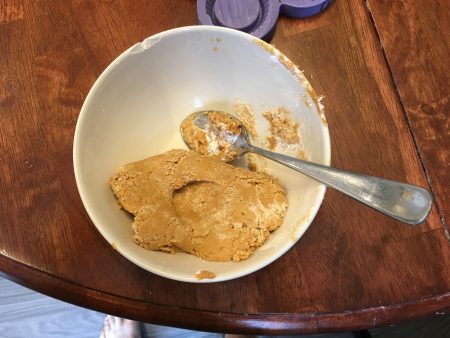
It ends up as a dough that isn’t as sticky as the soy butter began. This allows it to be put into the chocolate shells rather easily.
Finishing it up
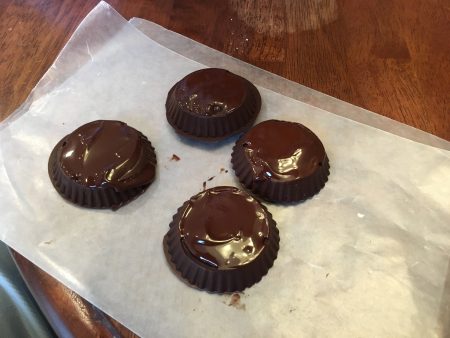
Now upside-down, additional chocolate is poured to cover the opening and seal in the delicious center.
Conclusion
The result was very tasty, and completely satisfactory. It’s time intensive. The chocolate takes a LONG time to harden. 4-6 hours at room temperature. This can be sped up by placing the chocolate int he refrigerator or the freezer, but cooling the chocolate too quickly can have negative results.
The Reese’s company (Mars) clearly doesn’t make their cups in this manner. Since the paper liner appears to be the actual mold for the chocolate, I suspect they do it in the opposite fashion. They pour the chocolate into the cup with a removable core that leaves a void when removed. The insides get inserted via extrusion, and then the cup gets topped off with chocolate and packaged once solidified. Empty cups that popup online from time to time seem to confirm this theory.
No matter what, I am happy with the result, and my son can now know of the exquisiteness that is a Reese’s cup.